Traum Messer fast kostenlos bei Amazon

Mal ein etwas spaßiger Beitrag. Bei Amazon ist ein Messer besonders beliebt bei Kunden: Misono UX10 Petty 5.9″ (15cm) – Right (japan import)

Das Messer kann unter anderem:
– durch 0 teilen
– einen Messergriff anbieten, der auch schneiden kann
– Laserschwerter kürzen
– die anstehende Arbeit teilen
– einen aktuellen Status auf Facebook mitTEILEN
– es beeindruckt sogar Chuck Norris

Das passt auch zu dem anderen legendären Messer auf Amazon: Wenger Schweizer Offiziersmesser Giant Messer, mit Schatulle
Mit über 800 Kommentaren auch nicht schlecht.

Wer ein ganz normales nettes Messer haben möchte kann für weniger als 20 Euro zu dem nicht minder schlechten: Victorinox Taschenwerkzeug Offiziersmesser Huntsman, Rot, 91mm, 1.3713

DNSpython on debian installation

To use dns lookups in python scripts on your raspberry or any other debian / ubuntu based system, dnspython is the perfect point to start.

Howto:

sudo apt-get install python-pip
pip install dnspython

Then try the examples on : http://www.dnspython.org/examples.html

Example Python script:

#!/usr/local/bin/python
import dns.resolver
domain = dns.name.from_text(dns_to_look)
nameserver = '8.8.8.8' #this is google nameserver, use your fav. DNS server
query = dns.message.make_query("google.com", dns.rdatatype.ANY)
response = dns.query.udp(query, nameserver, timeout = 2)
print response

Will result in:

python dns_test.py
id 41318
opcode QUERY
rcode NOERROR
flags QR RD RA
;QUESTION
google.com. IN ANY
;ANSWER
google.com. 182 IN A 173.194.113.169
google.com. 182 IN A 173.194.113.165
google.com. 182 IN A 173.194.113.166
google.com. 182 IN A 173.194.113.174
google.com. 182 IN A 173.194.113.160
google.com. 182 IN A 173.194.113.162
google.com. 182 IN A 173.194.113.168
google.com. 182 IN A 173.194.113.163
google.com. 182 IN A 173.194.113.161
google.com. 182 IN A 173.194.113.167
google.com. 182 IN A 173.194.113.164
google.com. 13460 IN NS ns1.google.com.
google.com. 13460 IN NS ns3.google.com.
google.com. 13460 IN NS ns4.google.com.
google.com. 13460 IN NS ns2.google.com.
google.com. 100 IN AAAA 2a00:1450:4005:808::1007
google.com. 50 IN SOA ns1.google.com. dns-admin.google.com. 1549778 7200 1800 1209600 300
;AUTHORITY
;ADDITIONAL

You can now use the script in your own scripts to search for DNS results.

To find some examples for ussage of DNS python see the example page of the project: http://www.dnspython.org/examples.html.
I am using the script to check the DNS settings for domains found with other tools that I am running. You could also store the DNS entries for your requests and build your database, that would result in a „low cost passive DNS database“.

Raspberry Pi nagios open monitoring distribution

This Blog Post will cover a howto for a complete monitoring setup.

I wanted to create a monitoring solution for a bunch of Raspberry Pi, a FritzBox, a QNAP Nas, Windows Clients and Apple OSX Workstation.

The monitoring device is another Raspberry Pi with Raspian installed.

The first coice for a monitoring solution is of course Nagios. It’s free, it’s open source and it’s high scalable. The problem with Nagios out of the box: it’s complex, it is too complex to do it in the small home network.

To save time, there is an complete collection of tools called OMD – open monitoring distribution.

OMD avoids the tedious work of manually compiling and integrating Nagios addons while at the same time avoiding the problems of pre-packaged installations coming with your Linux distribution, which are most times outdated and provide no regular updates.

OMD bundles Nagios together with many important addons and can easily be installed on every major Linux distribution. We provide prebuilt packages for all enterprise Linux distributions and also for some other, such as Ubuntu.

A german howto for installing OMD on an Raspberry Pi is available here.

This monitoring pi is now named nagiospi.

But to use the version 1.0 you will need the following commands:


sudo su
echo 'deb http://labs.consol.de/repo/stable/debian wheezy main' >> /etc/apt/sources.list
gpg --keyserver keys.gnupg.net --recv-keys F8C1CA08A57B9ED7 #install PGP Key of Sven Nierlein sven.nierlein@consol.de
gpg --armor --export F8C1CA08A57B9ED7 | apt-key add -
apt-get update
pi@nagiospi ~ $ sudo apt-cache search omd
cp2k - Ab Initio Molecular Dynamics
customdeb - Modfies binary Debian package
dicomnifti - converts DICOM files into the NIfTI format
isomd5sum - ISO9660 checksum utilities
libtemplate-provider-fromdata-perl - module to load templates from your __DATA__ section
python-pyisomd5sum - ISO9660 checksum Python module
tofrodos - Converts DOS Unix text files, alias tofromdos
vrflash - tool to flash kernels and romdisks to Agenda VR
omd - Open Source Monitoring Distribution
omd-1.00 - Open Source Monitoring Distribution, containing Nagios,
root@nagiospi:/#apt-get install omd-1.00

After that you have to install a OMD site:


root@nagiospi:/#omd create pimon
will create a folder /omd/sites/pimon/tmp
root@nagiospi:/#ifconfig # to gather the IP of your Pi

You can now access the webpage using


The site can be started with omd start pipi. The default web UI is available at http://raspberrypi/pipi/ The admin user for the web applications is omdadmin with password omd. Please do a su - pipi for administration of this site.

root@nagiospi:~# omd start pimon
Starting dedicated Apache for site pimon…OK
Starting rrdcached…OK
Starting npcd…OK
Starting nagios…OK
Initializing Crontab…OK
root@nagiospi:~#

Now access http://$IP_OF_YOUR_PI/pimon with default credentials stated before.

To gather data, you will now have to login to another pi: senderpi.

The senderpi will provide an interface / port for the nagiospi to collect data. To do so, the script check-mk from Matias Kettner is perfect. It is available for Linux, Windows etc.

Want to learn more about Nagios / Monitoring:

root@senderpi:/#sudo apt-get install xinetd check-mk-agent

After that you have to edit at least the file: vi /etc/xinetd.d/check_mk
For security reasons, remove the # in the line and include the IP of $nagiospi

root@senderpi:/#vi /etc/xinetd.d/check_mk
only_from = 127.0.0.1 $IP_OF_YOUR_NAGIOSPI

so that only your nagiospi can access the port and the information.
To enable the script, change the value in the file from yes to:

disable = no

Restart xinetd:

root@senderpi:/# service xinetd restart
[ ok ] Stopping internet superserver: xinetd.
[ ok ] Starting internet superserver: xinetd.

Check if the service is running:

root@senderpi:/# netstat -anon | grep 6556
tcp 0 0 0.0.0.0:6556 0.0.0.0:* LISTEN aus (0.00/0/0)
root@senderpi:/# nc 127.0.0.1 6556
<<<check_mk>>>
Version: 1.1.12p7
AgentOS: linux
PluginsDirectory: /usr/lib/check_mk_agent/plugins
LocalDirectory: /usr/lib/check_mk_agent/local
AgentDirectory: /etc/check_mk
OnlyFrom: 127.0.0.1 $IP_OF_YOUR_NAGIOSPI
(...)

To increase security, use the following iptables rule to prohibit unauthorized access to the OMD / Nagios / mk-check port:

iptables -A INPUT -i eth0 -p tcp -s $IP_OF_YOUR_NAGIOSPI --dport 6556 -m state --state NEW,ESTABLISHED -j ACCEPT

You can also check from your nagiospi command line:

nc covert 6556 $IP_OF_YOUR_SENDER_PI

Now go to the page:

http://$IP_OF_YOUR_NAGIOSPI/pimon/check_mk/
Default username: omdadmin password: omd

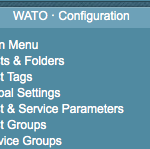
And go to „Hosts and folders“ on the left menu.

Click create host and insert all of the data:$IP_OF_YOUR_SENDER_PI.
–> Save and check services
Your nagiospi now tries to connect to your senderpi and checks for info.
Save it.
On the top screen there is a button „1 Change“ klick it and confirm it.

To change the password:

http://$IP_OF_YOUR_NAGIOSPI/pimon/thruk/#cgi-bin/conf.cgi?sub=users&action=change&data.username=omdadmin&

Now your host has been added to monitoring. All information should be available to your nagios and you will be alerted e.g. the SD card of the PI is running out of space.

Python PyDev Eclipse Ubuntu

To Use PyDev Eclipse Plugin on Ubuntu:


apt-get install eclipse
open eclipse
help --> Install New Software
add button
insert: PyDev
Position: http://pydev.org/updates
check all
accept license
Next
Window -> Preferences -> PyDev -> Interpreter -> Python
New -> link to python interpreter (default: /usr/bin/python)
finish

Raspberry Pi Backup script

Hier mal ein Tipp zum Wochenende zu einem Raspberry Pi Backup script welches ganz modular angesteuert werden kann.

Zur Auswahl stehen dd, tar, rsync und xbmc.
Es kann auch ausgewählt werden, welche Anzahl an Backups vorgehalten werden soll.

Die Backups können dabei auf z.B. ein Qnap NAS, oder eine externe Festplatte gespeichert werden.

Das Backup script ist hier erhältlich.

Amazon Kindle Paprwhite Hard Reset

Probleme mit dem Amazon Kindle Paperwhite? Ist ein Software update des Kindles abgebrochen oder stehen geblieben?
Stürzt der Kindle Paperwhite beim Starten ab oder hat er Probleme, dass er statt in den Standby, wieder in den normalen Modus wechselt?

Der Amazon Kindle Paperwhite kann durch folgenden Kniff Hard Resettet werden:

20 Sekunden den Ein-/Ausschalter gedrückt halten

Dann startet das Gerät kalt durch.

Viel Erfolg

Kippo Honeypot stop

To stop Kippo Honeypot, you could use two options, first you could check your connections:


netstat -l -p

and then kill the process with the PID via


kill -9 $PID

Or you could use the small script available at github (https://github.com/beardyjay/bHoneypot/issues/15):

#!/bin/sh

PIDFILE=kippo.pid

if ! [ -f $PIDFILE ]
then
echo „Kippo is not running ..“
exit
fi

PID=$(cat $PIDFILE)

echo „Stopping Kippo ..“
kill -TERM $PID
rm -f $PIDFILE

with the result:


pi@raspberrypi ~/kippo-read-only $ ./stop.sh
Stopping Kippo ..

Raspberry Pi with Amazon Prime Video Flatrate

Nachdem Amazon einen neuen Bestandteil von Amazon Prime angekündigt hat, stellt sich natürlich die Frage, ob auch ein Plugin für Amazon Prime Video on Demand für den Raspberry Pi bzw. raspbmc / XBMC kommen wird.

Vermutlich haben viele Nutzer einen Raspberry Pi als Mediacenter an ihrem Fernseher und würden sich darüber freuen, den Pi als Streaming client für Amazon Prime nutzen zu können.

Ein Plugin für den Raspberry Pi und Lovefilm, die Amazon Tochter, gibt es meines Wissens nach auch schon. Eine Ankündigung, dass Kindle Fire unterstützt wird, hab es schon.

Update 28.02.2014:
Evtl. hilft dieses Repo aus diesem Artikel.

grep Kung Fu

Some nice grep tricks:

search for mail adresses within a given file:
grep -E -o "\b[a-zA-Z0-9.-._]+@[a-zA-Z0-9.-]+\.[a-zA-Z0-9.-]+\b"

Search for multiple words given in a file with one keyword each line:
cat inputfile.txt | grep -Ff file_with_keywords.txt > results.txt

Search multiple words given by command line:
cat inputfile.txt | grep -iE "(keywords1|keyword2|keyword2)" > results.txt